Introduction
A couple of weeks ago, I stumbled upon some amazing living room videos on Instagram. After closer inspection, I discovered that these videos were all AI generated. To my surprise, the Instagram page that posted these videos has almost 10 million followers and receives tens of millions, sometimes even over 100 million views.
It’s safe to say that this page is making tens of thousands of dollars every month from these videos.
Intrigued by this, I decided to figure out how these videos are made, and to my surprise, it’s very easy and can be done entirely for free.
In this blog, I will show you how to make these relaxing videos so you can start your own faceless Instagram page or use them as backgrounds for your faceless lo-fi music channels. Let’s get started!
Generating the Images
To create these relaxing videos, we will be using AI image generators. One of the best options is Mid Journey, but if you prefer a free alternative, you can use Leonardo or Playground.
- Leonardo offers 150 free credits daily, which is more than enough to get started.
- With Playground AI you can create free images forever (1080px max), free 30 upscale per month
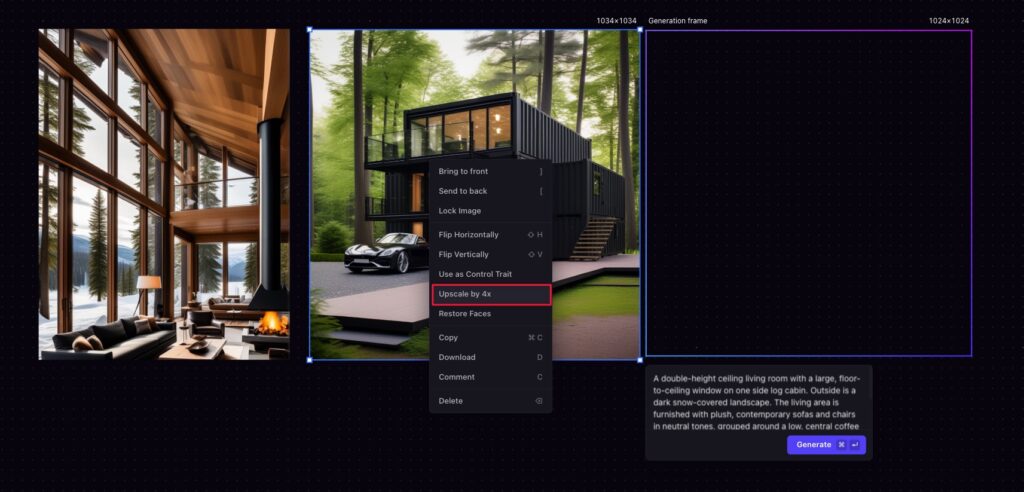
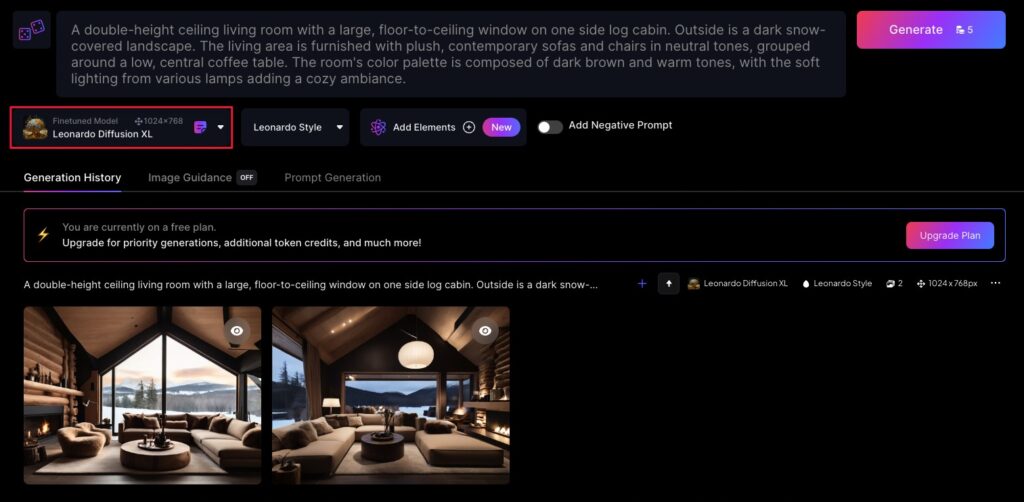
The first step is to generate living rooms with large floor-to-ceiling windows. For this, I recommend using the Leonardo diffusion model. I have created a prompt that you can use to generate these rooms, which you can find in the video description. Make sure to instruct the AI to generate a double-height room with floor-to-ceiling windows. After generating the image, I recommend using the upscale image alternate function within Leonardo to improve the quality. Download the image.
Next, you need to generate an image for the background, representing the view from the window. Use the prompt I have created and generate the background image. Upscale the image and download it.
Images Processing
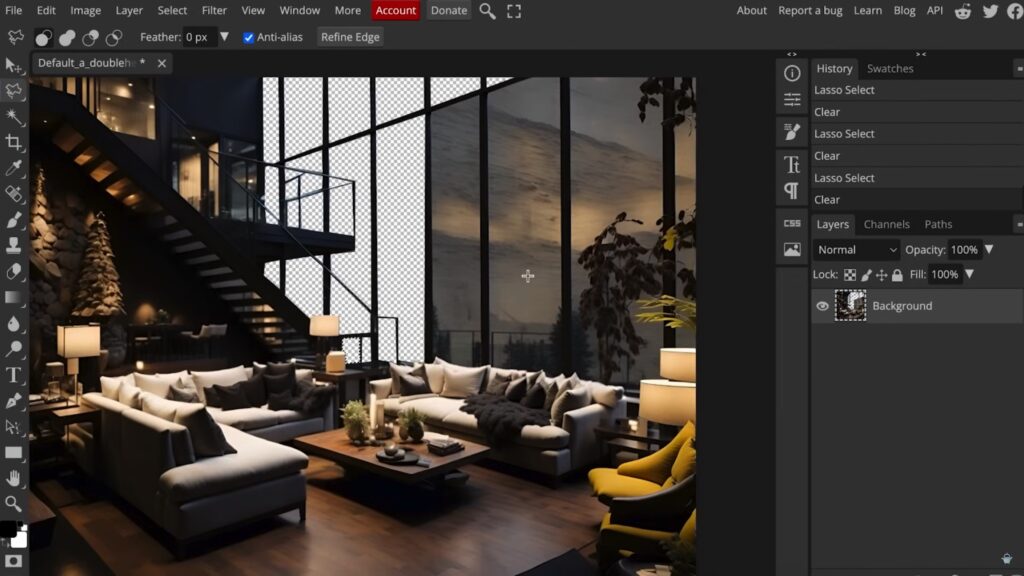
In order to bring these images to life, you will need to cut out the windows from the room image. You can use Photoshop for this, but if you prefer a free alternative, you can use Photopea, a free-to-use Photoshop program that runs in your browser.
Upload the room image to Photopea and use the polygonal lasso select tool to draw straight lines around the windows. Start in one corner of a window, select each corner until you have completed the entire window, and press backspace on your keyboard to delete the window part of the image. Repeat this process for every window in the image, using the magic wand tool for more complex areas such as the windows near the couch. Save the image as a PNG file.
Next, to make the photo feel like it’s moving, use LeiaPix or InstaVerse.
Adding the Effect
Now, let’s add a snow effect (or something you think is match with your images) and background behind the window to make the image come to life. To do this, you will need a snow effect green screen video, which you can find on YouTube. Download the video and upload it to your editing program.
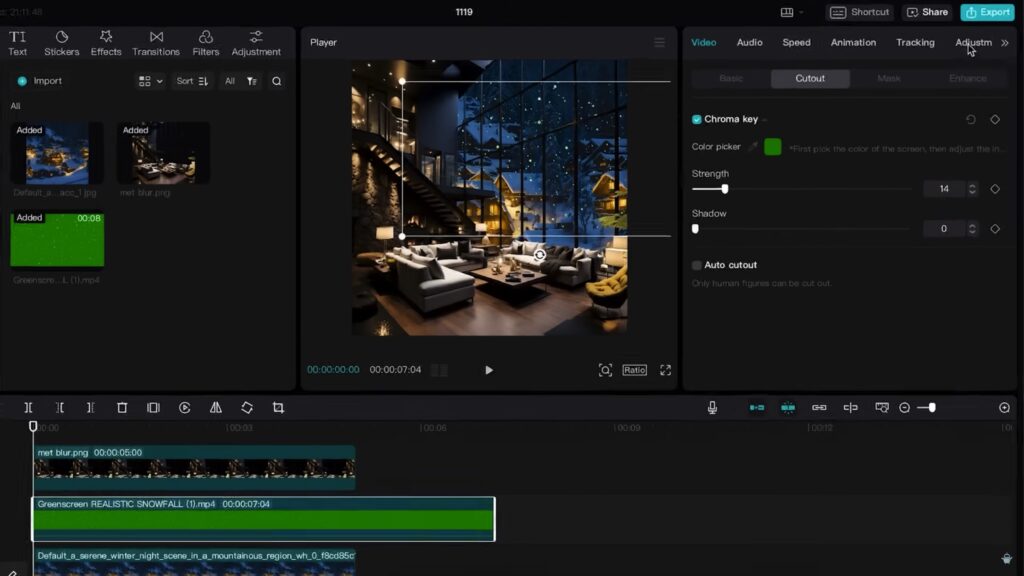
In the editing program (Capcut or Adobe Premiere Pro), place the background image on the timeline first, followed by the image with the cutout windows. Then, add the snow effect video between the background image and the window image. Enable the chroma key option and select the green color of the snow video to remove the green background.
Adjust the strength until the green disappears, but be careful not to lose too many snowflakes. To enhance the effect, adjust the saturation slider to the left to remove all color from the video, leaving only white snowflakes.
Increase the brightness slider to the right to make the snowflakes more prominent.
Resize the snow effect video and copy and paste it multiple times to cover the entire video.
Make sure to adjust the direction of each snow effect layer for a more realistic look.
Finally, adjust the brightness of the background image if needed. Export the video.
Adding more details
If you want to add a fireplace (or something) to the video, search for a fire green screen video on YouTube, download it, and upload it to your editing program.
Follow the same steps as with the snow effect to remove the green color and adjust the size of the video to fit inside the fireplace.
You can also crop the top part of the fire for a better fit. Combine the snow effect and fireplace videos into a compound clip. Set the aspect ratio to 9:16 for short-form content on platforms like YouTube Shorts, TikTok, and Instagram Reels. Place the video on the left side of the screen and animate it to move from left to right. Export the final video.
Conclusion
Creating relaxing videos with AI is incredibly easy and can be done for free. By following the steps outlined in this blog, you can generate stunning living room scenes with floor-to-ceiling windows, add a snow effect, and even include a fireplace.
These videos can be used for your own Instagram page or as backgrounds for Lo-fi music channels. With millions of views and a large following, there is great potential to monetize this type of content.
If you’re interested in learning more ways to make money with AI-generated content follow my next sharing.